Sun May 26 2019
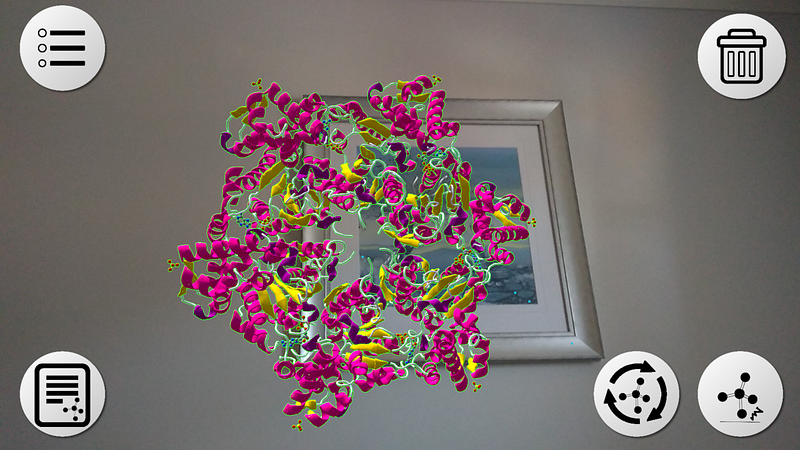
During the course of developing an augmented reality molecular viewer one of the most difficult, and barely documented, things I found was converting the text based chemical object file formats, such as .MOL, into standard 3D file formats, OBJ or .FBX, that can be used with available game engines. Chemistry is really ‘up for the taking’ when it comes to augmented reality; there is a whole load of potential but without any major applications. So, I hope this guide will aid the process of producing models for Chemistry AR experiences for other developers. This article documents the process I took to optimize chemical models to reduce performance impact when using an already performance taxing AR SDK, such as ARKit and ARCore. But the models generated can be used in any application within a video game engine.
Prerequisites
Firstly, your system will need to have Blender installed and Jmol downloaded. Experience with either of the programs is not necessary as you’ll be guided through what functionality you need to use.
Getting a Chemical 3D Object File
Any 3D chemical files downloaded need to be able to be read by Jmol. The example I will be using is a .MOL file downloaded from ChemSpider. More information on chemical file formats is readily available on Wikipedia.
Using Jmol to Generate a .OBJ File
So, with the chemical model file downloaded, you now need to boot up Jmol by running the ‘Jmol.Jar’ file contained within the folder where you extracted the Jmol application.

With the Jmol window loaded, you can simply drag and drop the download chemical file into it and the molecule should load. In the example below I was working on a Ethanoic Acid molecule with its hydrogen atoms removed.

Then, click the ‘File’ option in the toolbar and click the ‘Console…’ option. This should bring up the Jmol Script Console that you can use to execute various commands. In this case, you want to generate a .OBJ file to be used in Blender to ‘clean up’ the structure. So, input the following command:
write CHEMICALNAME.obj
Where ‘CHEMICALNAME’ will be the name of the converted file. Clicking enter will run this command and output a .OBJ file in the folder containing the Jmol.Jar file.
Using Blender to Clean Up The Structure
Now, if you’ve done any work in a video game engine before you’re probably thinking ‘but, can’t we just use the .OBJ file as it is now? It’s compatible as it is’. While that is true there are multiple issues that can only be addressed through editing the structure in Blender. Often, the center of the model within the .OBJ file is completely offset from where it ‘should’ be. So rotating the model in the video game engine causes it to rotate around this offset point, rather than its actual center point. Another issue is that the generated .OBJ file from Jmol is split it many individual sections and contains an overly complicated amount of faces.
For small molecules this is not much of an issue. But for large ones, such as proteins, this means the model will have a massive performance impact on your application.
With this addressed, open Blender. To delete the start up items double tap the ‘A’ key and click the ‘Delete’ key. This removes all items in the current scene. Now, import the generated .OBJ file following the instructions in the below image.

Then in Blenders file explorer navigate to the location of the generated .OBJ file and click the ‘Import OBJ’ button. The model should now be imported and you can scale/move the molecule to your liking. As you can see in the model below, the center point is severely offset.
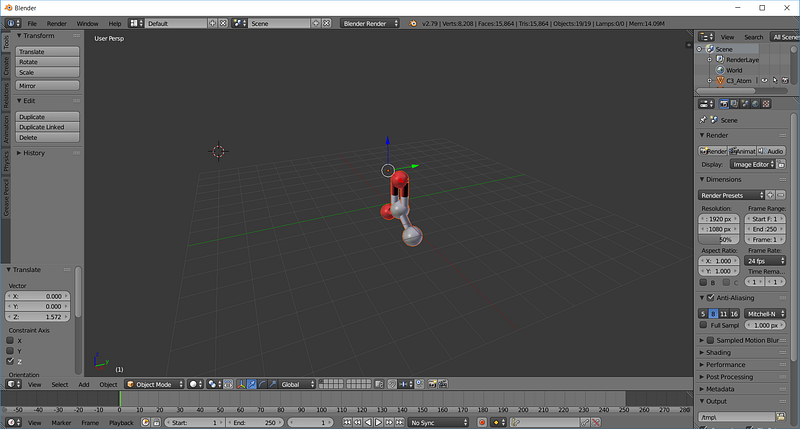
If you expand the top right section that lists all the items in the scene you can see that the molecule model is made up of lots of individual components corresponding to atoms and bonds.
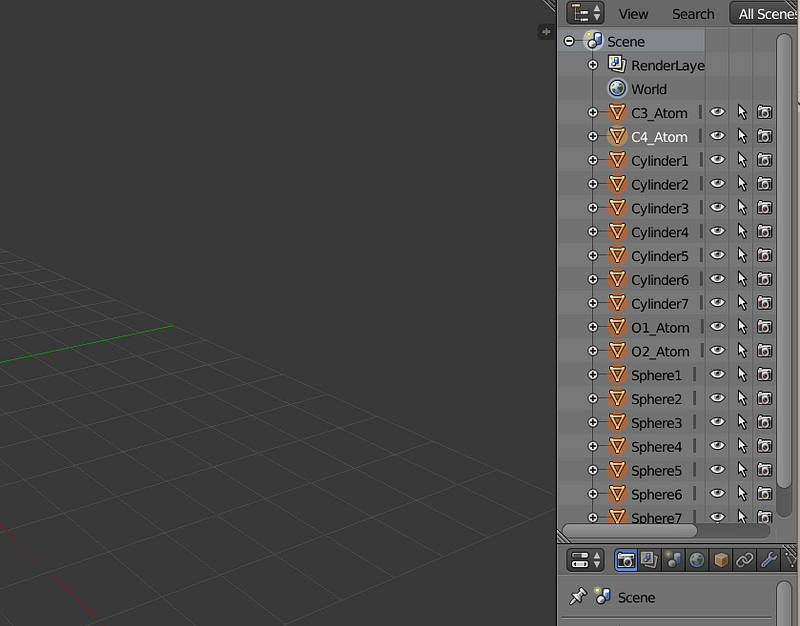
So, to optimize the model these are best being combined.
Right click on any part of the molecule and then double tap the ‘A’ key, then in unison press ‘CTRL+J’. This will combine all the selected items into one item. Now the item list in the top right should be a lot shorter.
Then, it’s time for the longest shortcut I know. In unison click ‘CTRL+SHIFT+ALT+C’ which should bring up a pop up menu. Click the ‘Origin to Geometry’ option. This will have fixed the origin offset issue, and you should see the origin of the model is at the center point of the model. At this stage I also like to position the molecule to the center of the scene.
Finally, in the far right bottom panel below the scene item list there should be a few icons, click the spanner icon. Then click the ‘Add Modifier’ button. This should bring up a menu that is shown below.

Select the ‘Decimate’ option. In the modifier box you can now select the ratio by which to decimate the model by, which will reduce its amount of faces and optimize the model to have less of a performance impact whenever it is used. Generally you can set the ratio to 0.4 without any drastic change to the model.
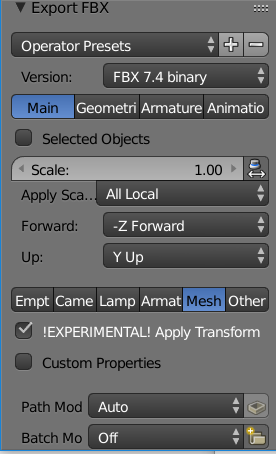
Exporting as an .FBX file can be done by clicking ‘File’ then ‘Export’ then ‘FBX’. Then, select the export location with the Blender file explorer and click the ‘Export FBX’ button. The .FBX export export settings I use are shown below.
Final Words
And there you have it, a molecular model that is now compatible for use within Unity, Unreal Engine, or any other video game engine that supports modern object file formats. Hopefully in the future Chemistry software will support this kind of optimization and exporting to .OBJ and .FBX file formats without any kind of manually clean up. If anything, this article should demonstrate a process that is in painful need of automation.
By Callum Houghton on May 26, 2019.
Exported from Medium on April 16, 2021.